Did you know that you can add photos from your smartphone straight into your projects and stash? No need to email or Airdrop them to yourself—you can pull them right into Ravelry from your camera roll.
If you want to quickly add one photo...
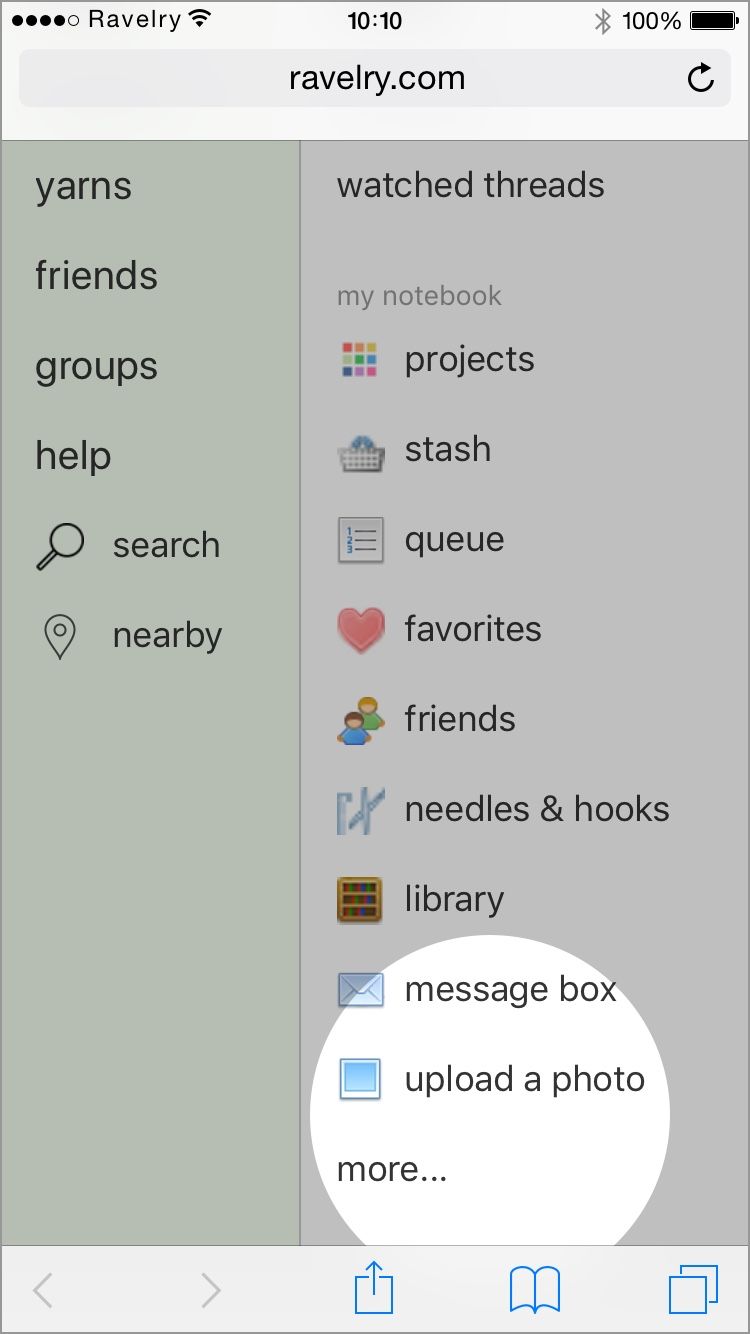
1. In your mobile browser (the Safari or Chrome app), go to www.ravelry.com, log in to your account, tap the yarn icon in the upper left to open the mobile menu, and tap Upload a Photo:
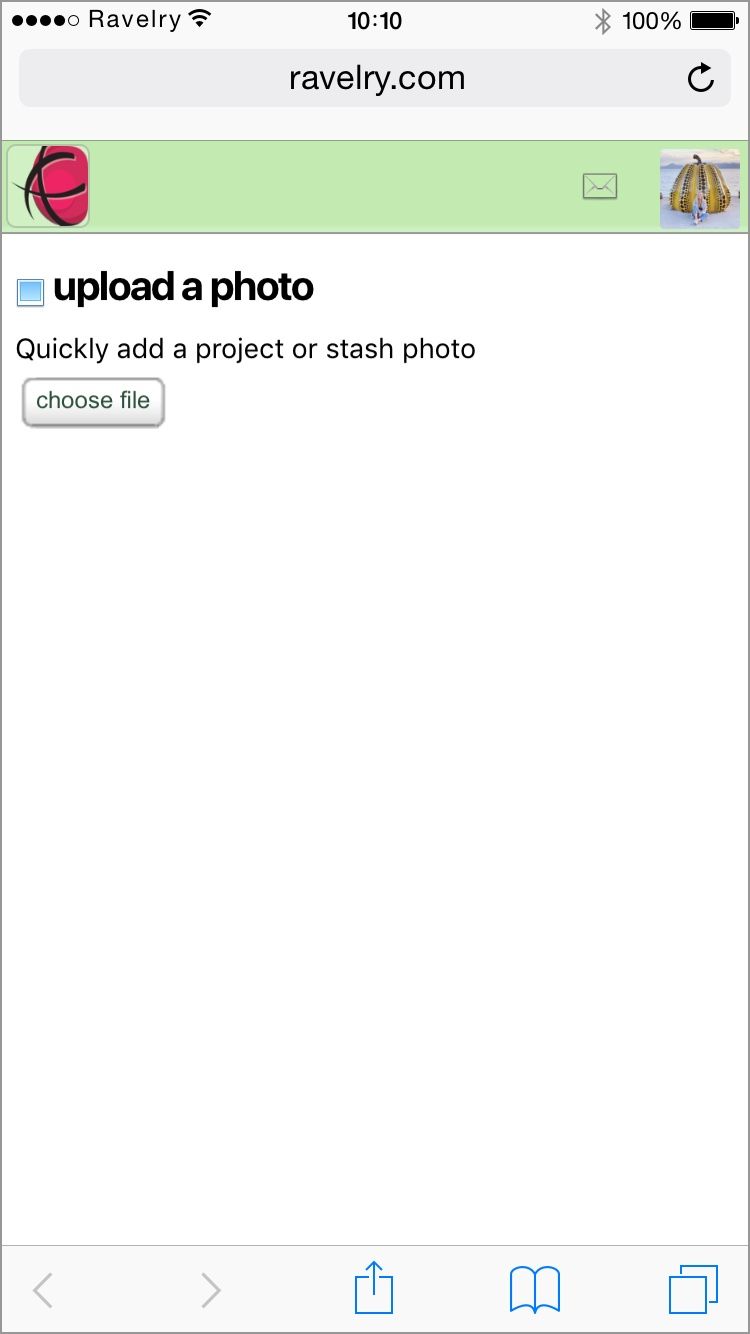
2. You'll be taken to this page. Tap Choose File, then either take a photo or pick one from your camera roll.
3. You'll then be asked whether you want to create a new project or stash a new yarn with this photo, or add it to an existing project or yarn. Your most recent existing projects and yarns will show, but you can also search for others that aren't showing there.
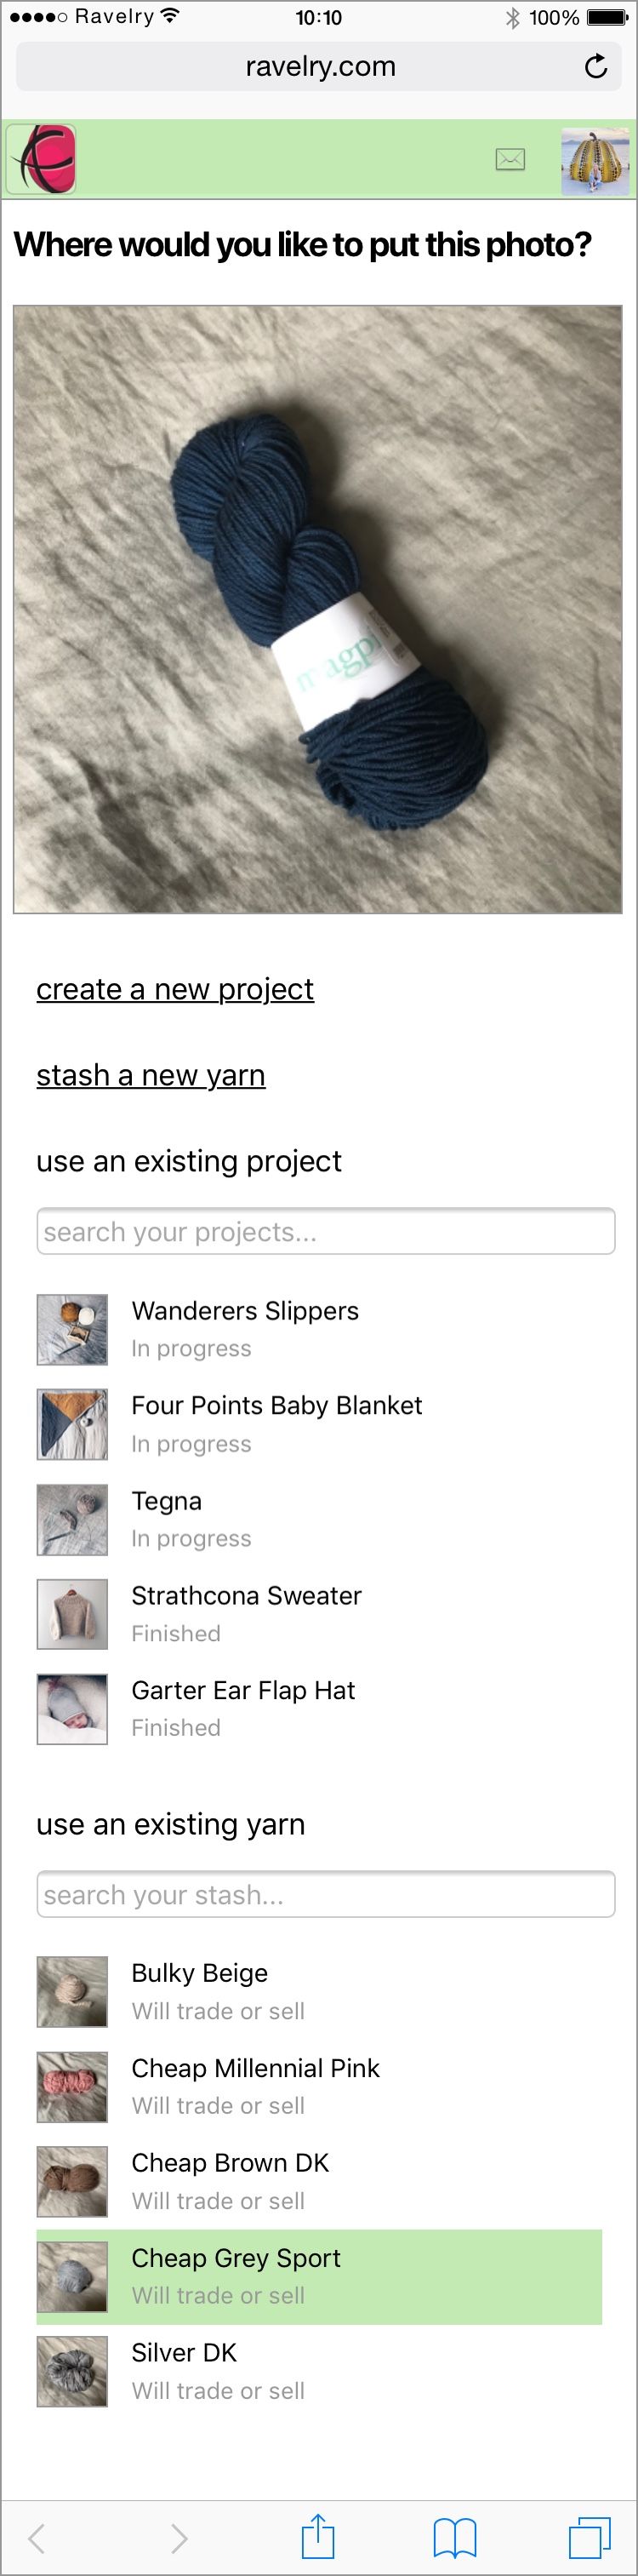
Regardless of which option you choose, you'll have options for editing your photo along the way, which you can see more about below. Easy! ⚡️
If you want to add multiple photos
Today we'll focus on how to add multiple photos of yarn to your stash, but the process is the same for projects.
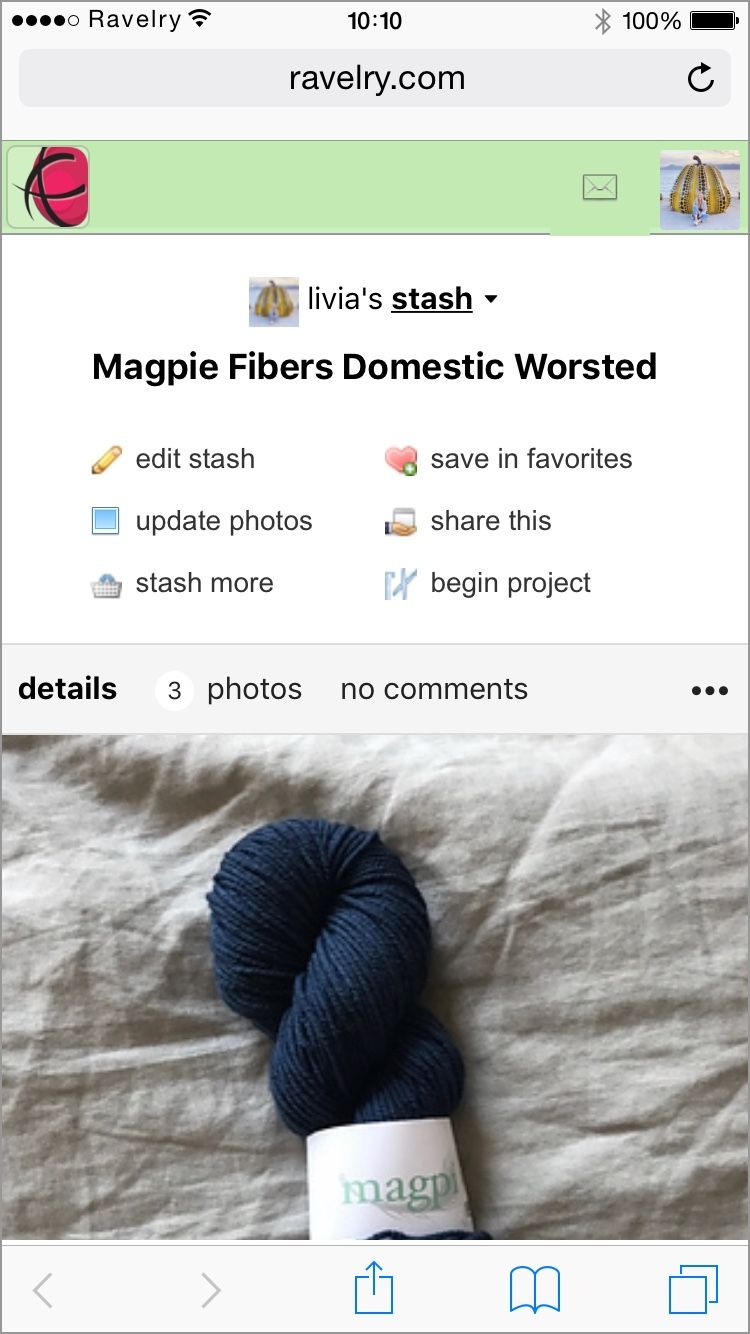
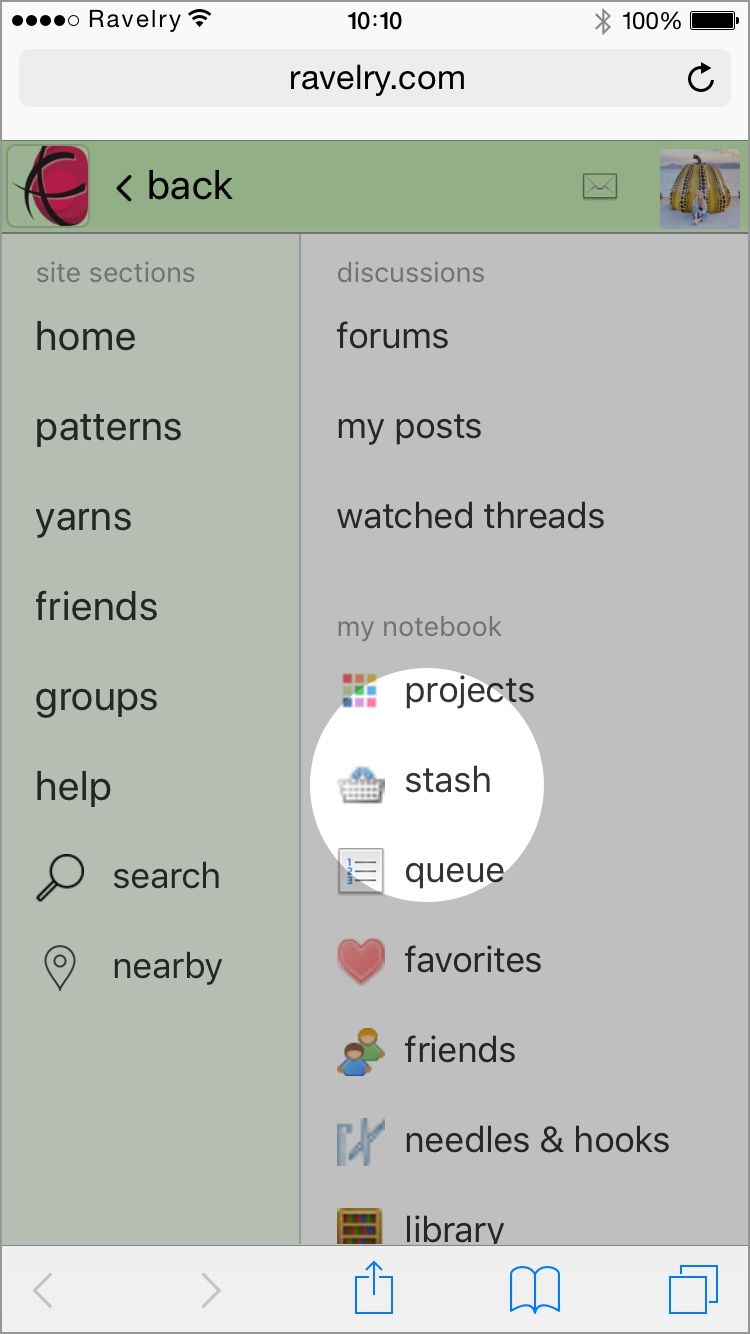
1. In the mobile Ravelry menu, tap Stash:
2. I usually create a new project or stash entry on my laptop, then go to the entry on my phone to add photos—but you can also create a fresh project or stash entry on the Ravelry mobile site, in which case you'll be prompted to add a photo along the way.
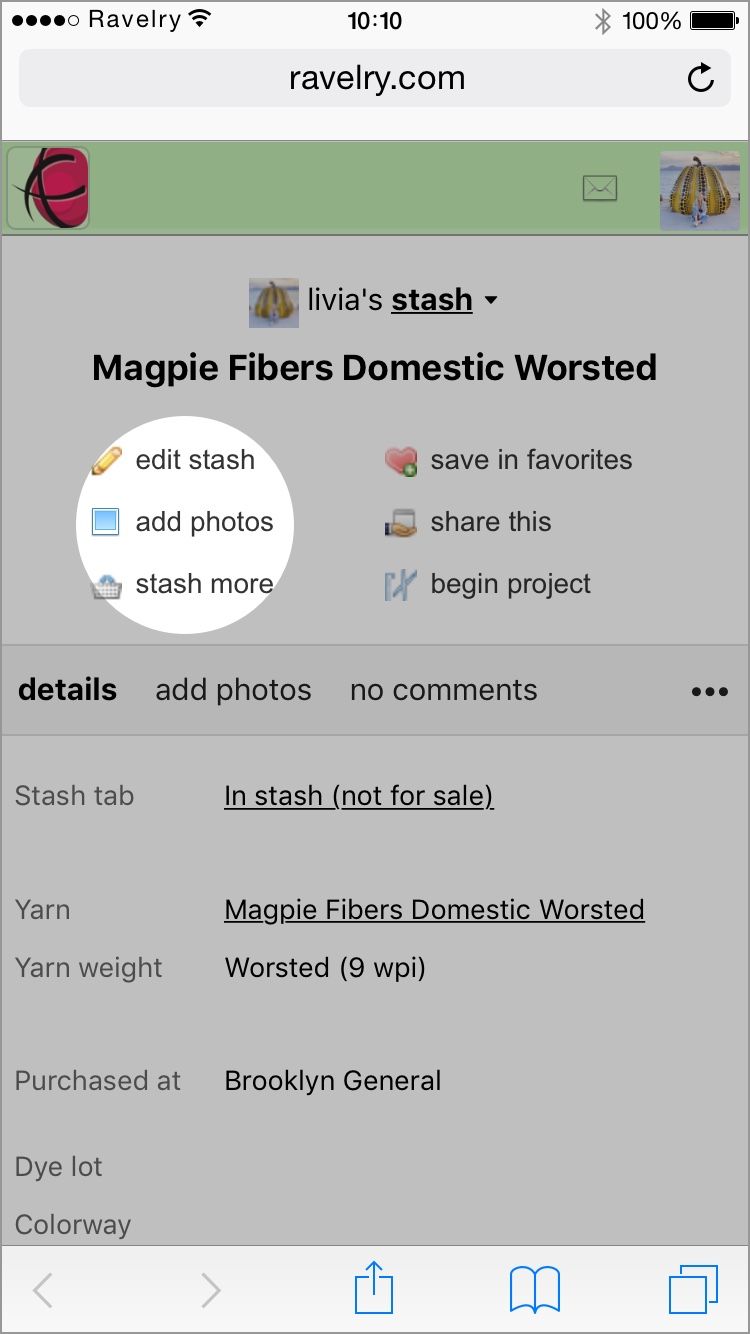
3. If you click on either of the Add Photos buttons in the above screenshots, you'll be taken to the below photo upload screen. Across the top you can see options for several photos sources, as well as a few additional ones under the (...) menu. These are all awesome ways you can pull in images from elsewhere (I'm a big fan of the Instagram one—instructions on how to hook that up are here), but today we'll focus on uploading straight from your phone.
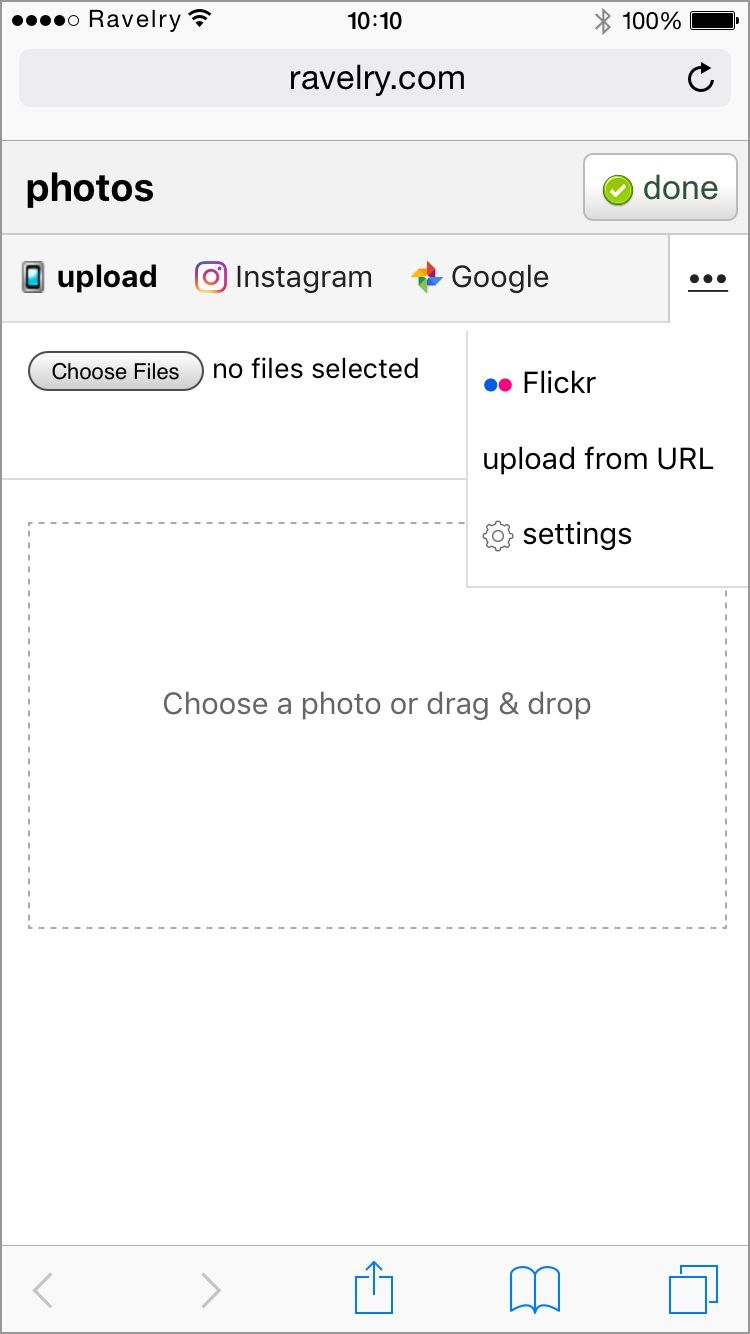
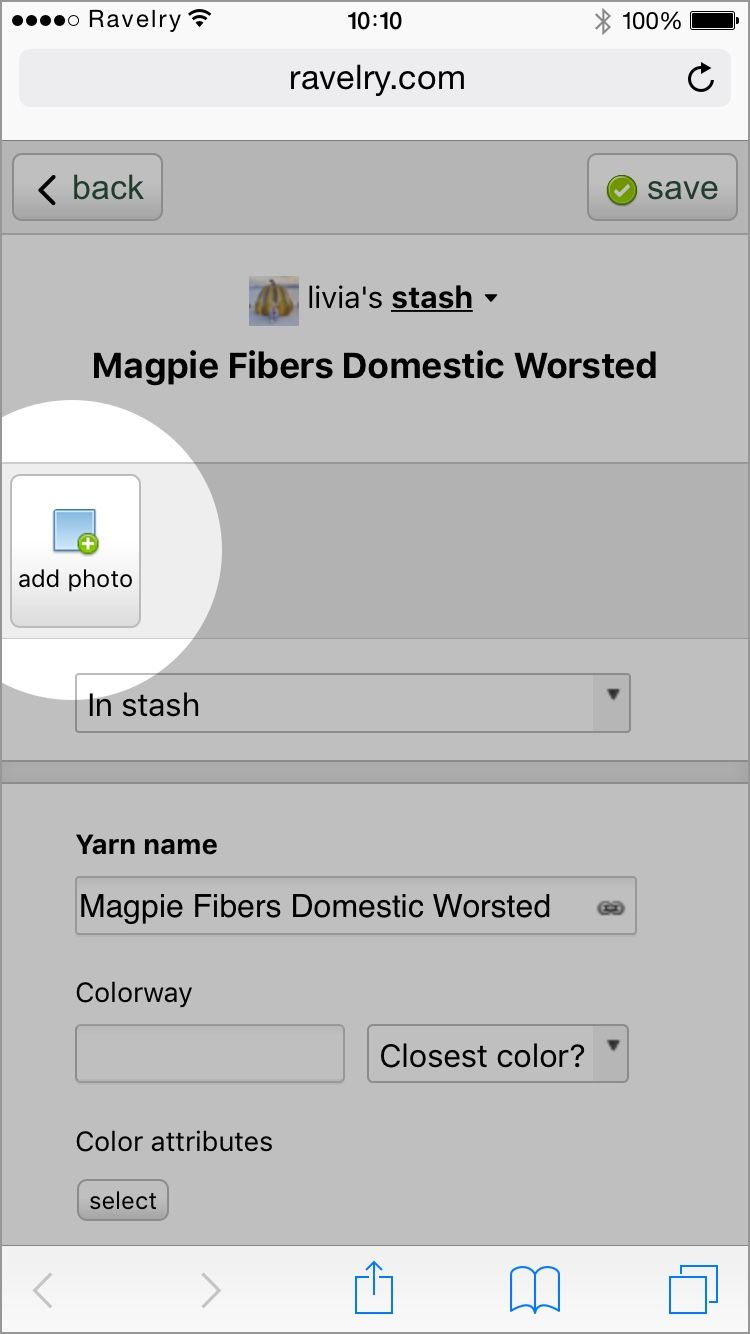
4. Tap Choose File, then either take a photo or pick one from your camera roll.
One important thing to note here is that you can upload several photos at a time! You don't have to do them one by one. Just tap all of the photos in your camera roll that you want to add.
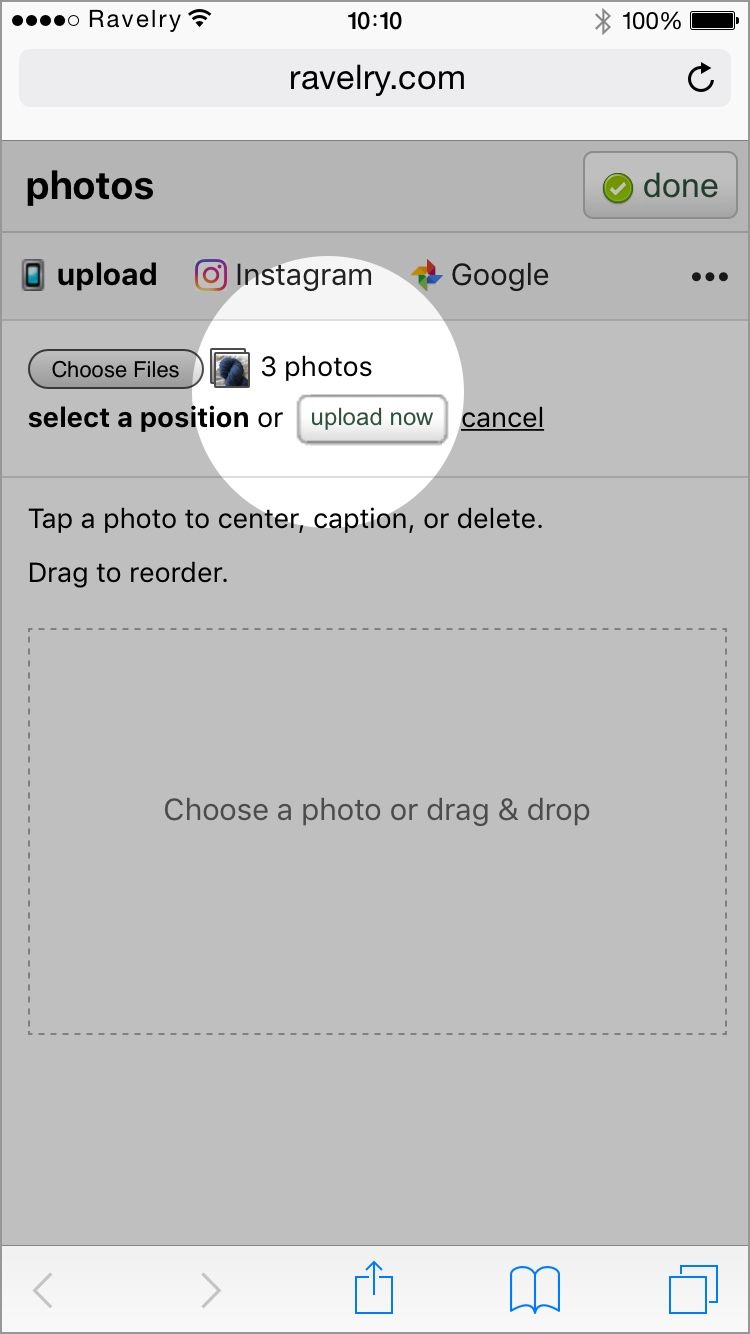
5. Once you've chosen your photo(s), you'll see them here, ready to go. They're not uploaded yet though, so tap Upload Now:
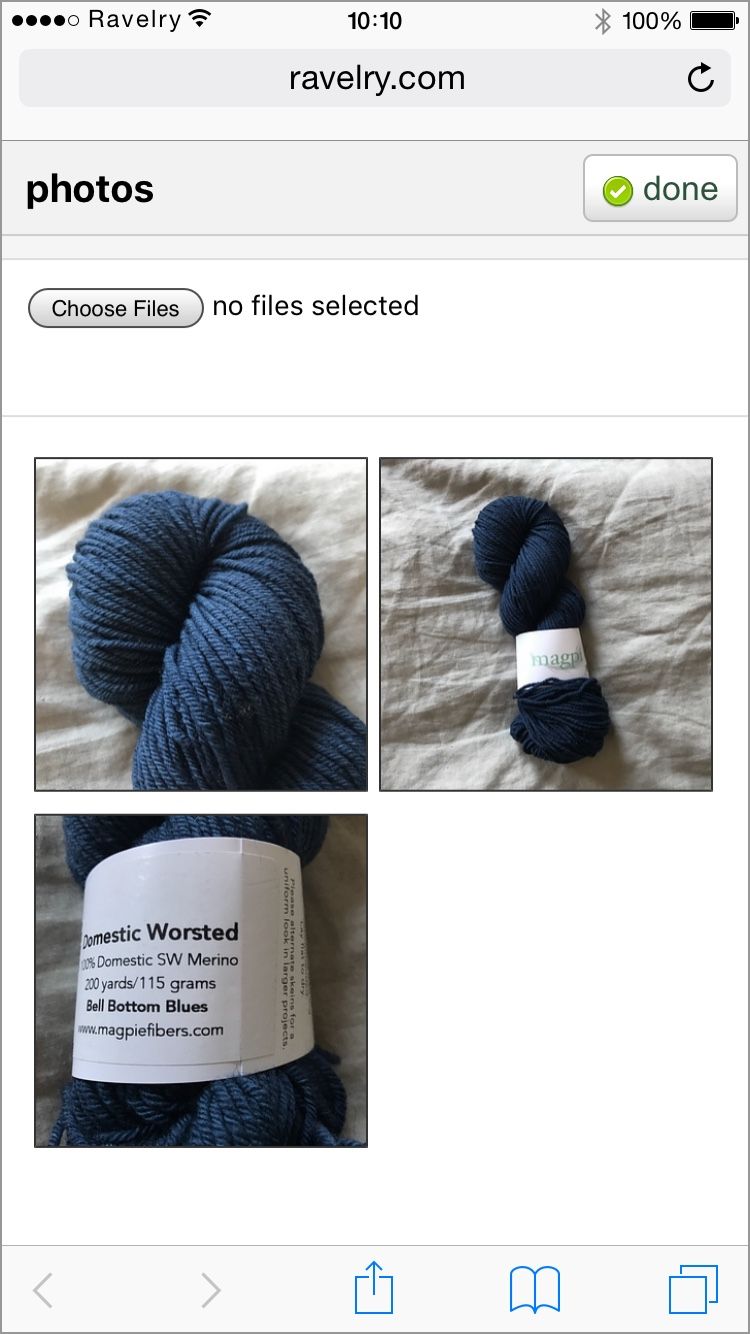
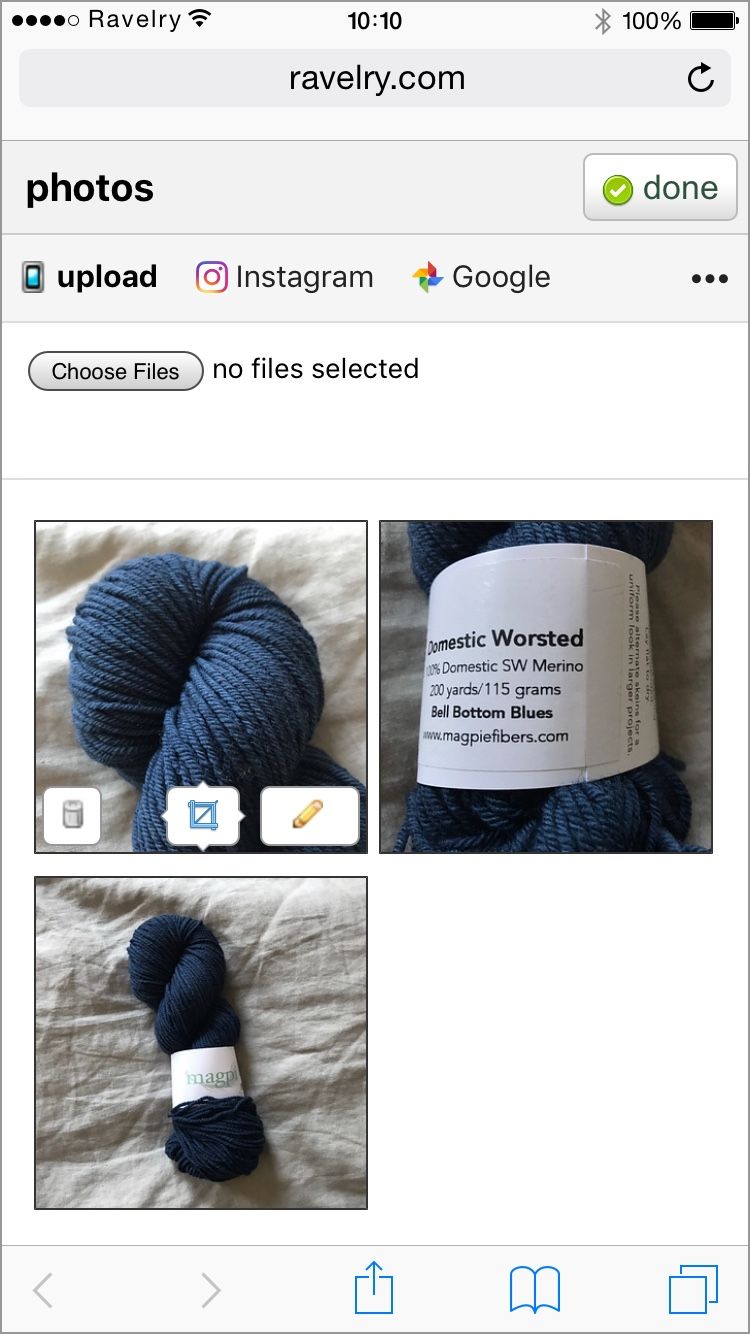
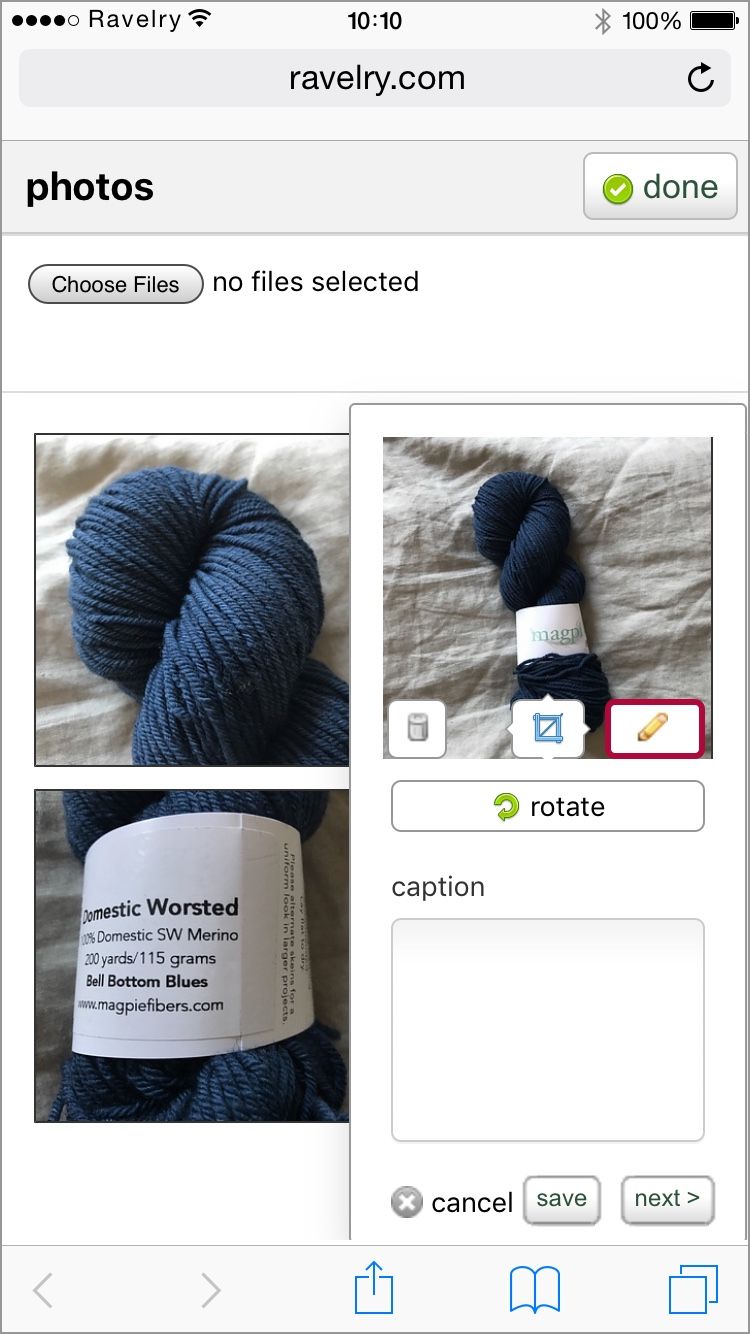
6. Then you'll see your photos upload onto the page ✨Before you click Done, you can reorder, crop, delete, rotate, or caption your photos:
7. When your photos are all good to go, tap Done and you'll see them load into the page. And voila, there they are 🎉 If you want to go back and change anything or add more, just click on Update Photos again.